Tenant workgroups
Note: The user interface and functionality for the Workgroups management screen changed significantly in Version 20.4 Update 10.
Workgroups are used to control users' access to functions and configuration settings in the tenant (most of these functions are application-specific while a few are common to all of the Planning Space applications).
You can add or remove user accounts from membership of a workgroup using the Workgroups interface.
The effects of belonging to a workgroup are mostly determined by the roles that a workgroup is allowed to use. These role permissions are set in the Tenant roles management interface.
Three workgroups are created by default for a new tenant:
- Administrators: this workgroup has access to all functions and all configuration settings for the tenant. By default, only Administrators can create or manage the user accounts, workgroups and roles of the tenant (but these roles can also be assigned to new workgroups). An initial administrator user with login ID 'Administrator' and password 'Administrator' is always created when a new tenant is created, and this is the only initial means for tenant administration.
- Everyone: all users are automatically members of this workgroup. By modifying the roles which Everyone is assigned to, you can control which features of the Planning Space applications are made 'public' and available to all users.
- SecurityAdministrators: by default this does not have any user members. (The workgroup name can be modified, and the workgroup can be deleted if it is not needed.)
The Workgroups management interface can be accessed in the Planning Space Tenant Web interface
(see
Tenant login).
Click the Apps Grid menu button
 at the top left and select Security, then click the
Workgroups
at the top left and select Security, then click the
Workgroups  button
in the left-hand side menu.
button
in the left-hand side menu.
Note: You can only access this screen if you are logged in as an Administrator user.
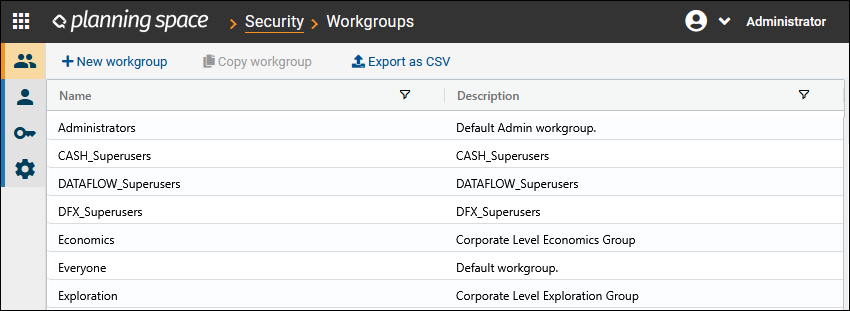
You will see the names and descriptions of the existing workgroups for the tenant.
Workgroups display
The table of workgroups shows Name and Description columns.
Each column in the table has two buttons in the column header:
- Filter button
 : Use
this to filter by search string, or by cell contents
: Use
this to filter by search string, or by cell contents - Options button
 (this
button is only visible when the mouse is hovering over the column header)
(this
button is only visible when the mouse is hovering over the column header)
Create a new workgroup
Click the New workgroup button to create a new workgroup.

In the General tab of the edit blade, type in a Name, Description, and optional Comments. Workgroup names can only contain alphanumeric characters, underscores (no spaces), and full stops; names can be up to 128 characters and must start with a letter. See below for the optional External Group and License Profile Workgroup settings.
Users tab: Use the tick boxes next to the user account names to set the initial user membership of the workgroup.
Roles tab: Set the roles that this workgroup is allowed or denied..
Click the Save button to create the new workgroup.
Copy a workgroup to a new workgroup
You can make a new workgroup as a copy of an existing workgroup by selecting one workgroup and clicking the Copy workgroup button. The new workgrooup is given the name '{NAME}_copy'. Edit the settings as required and click the Save button to store the new workgroup.
'External Group' setting
The External Group field is used in the configuration of automatic provisioning of tenant user accounts. See Automatic provisioning of tenant user accounts.
'License Profile Workgroup' setting
The License Profile Workgroup check box is used to mark a workgroup for use with License Profiles (which can be used to control and prioritize users' access to Planning Space product licenses). See License profiles for details.
Edit a workgroup
To edit the settings for an existing workgroup, click a workgroup name to open the edit blade. For example:
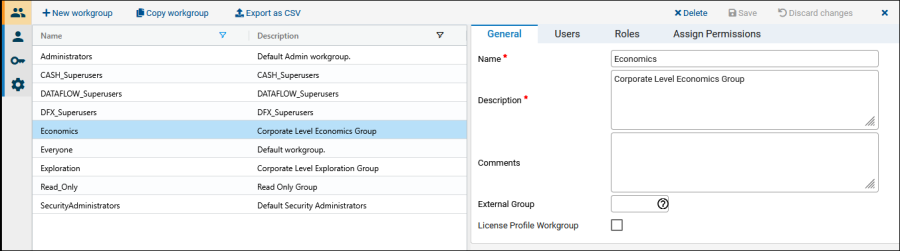
The workgroup that is being edited will be highlighted in blue. Click the X button at the top right corner to close the edit blade.
General tab: Workgroup names can be changed at any time, except for the 'Administrators' and 'Everyone' workgroups. You can also edit the Description and Comments.
Users tab: Use the tick boxes next to the user account names to add or remove user members of the workgroup.
Roles tab: Modify which roles this workgroup is allowed or denied (see Tenant roles).
There are two control buttons, which become activated when you have made an edit. Click the Save button to save the changes that you have made. Click the Discard changes button to undo any unsaved changes.
User membership editing
There are two functions to assist with user selections.
The Invert Selections button
 appears in the Users tab in the edit blade.
Clicking this button performs an inversion between selected and unselected users;
this is useful, for example, in the case of switching document permissions between a specified list of allowed users
and a list of denied users.
appears in the Users tab in the edit blade.
Clicking this button performs an inversion between selected and unselected users;
this is useful, for example, in the case of switching document permissions between a specified list of allowed users
and a list of denied users.
The
Copy user selections from other workgroups ![]() button
can be used to set user membership based on the settings in other
workgroups. Clicking the button opens another blade showing a list of workgroups. Select one or more workgroups; a list of
user accounts will appear. The radio buttons
Any or All mean that a user account will be selected
only when it is a member of all of the selected workgroups (i.e., logical AND selection), or any (one or more)
of the selected workgroups (i.e., logical OR selection). Click Use selected to select those
user accounts in the Users blade; any existing selections will be overridden.
button
can be used to set user membership based on the settings in other
workgroups. Clicking the button opens another blade showing a list of workgroups. Select one or more workgroups; a list of
user accounts will appear. The radio buttons
Any or All mean that a user account will be selected
only when it is a member of all of the selected workgroups (i.e., logical AND selection), or any (one or more)
of the selected workgroups (i.e., logical OR selection). Click Use selected to select those
user accounts in the Users blade; any existing selections will be overridden.
Assign entity-level permissions for a workgroup
It is possible to edit the entity-level permissions for hierachies (Dataflow) and regimes (Economics and Financials).
Click a workgroup name to open its edit blade, and select the Assign Permissions tab.
See Access permissions (entity-level) for hierarchies and regimes for explanation of the entity-level permissions.
Delete a workgroup
To delete a workgroup: click a workgroup name and click the Delete button in the edit blade.
Then click Delete in the confirmation dialog.
'Export as CSV' workgroup data
Click the Export as CSV button to export a file that contains the details of all of the workgroups, and also the Allowed and Denied roles.
Note: The role names are prepended by the application name (e.g., 'PlanningSpace Dataflow-Manage Data'); the same role name may be used for more than one application.